Getting Started with NVIDIA NIM
This guide walks you through deploying your fine-tuned LLMs using NVIDIA’s NIM framework. Whether you’ve just finished training a model or want to deploy existing checkpoints, we’ll help you get your models serving inference requests efficiently.What is NVIDIA NIM?
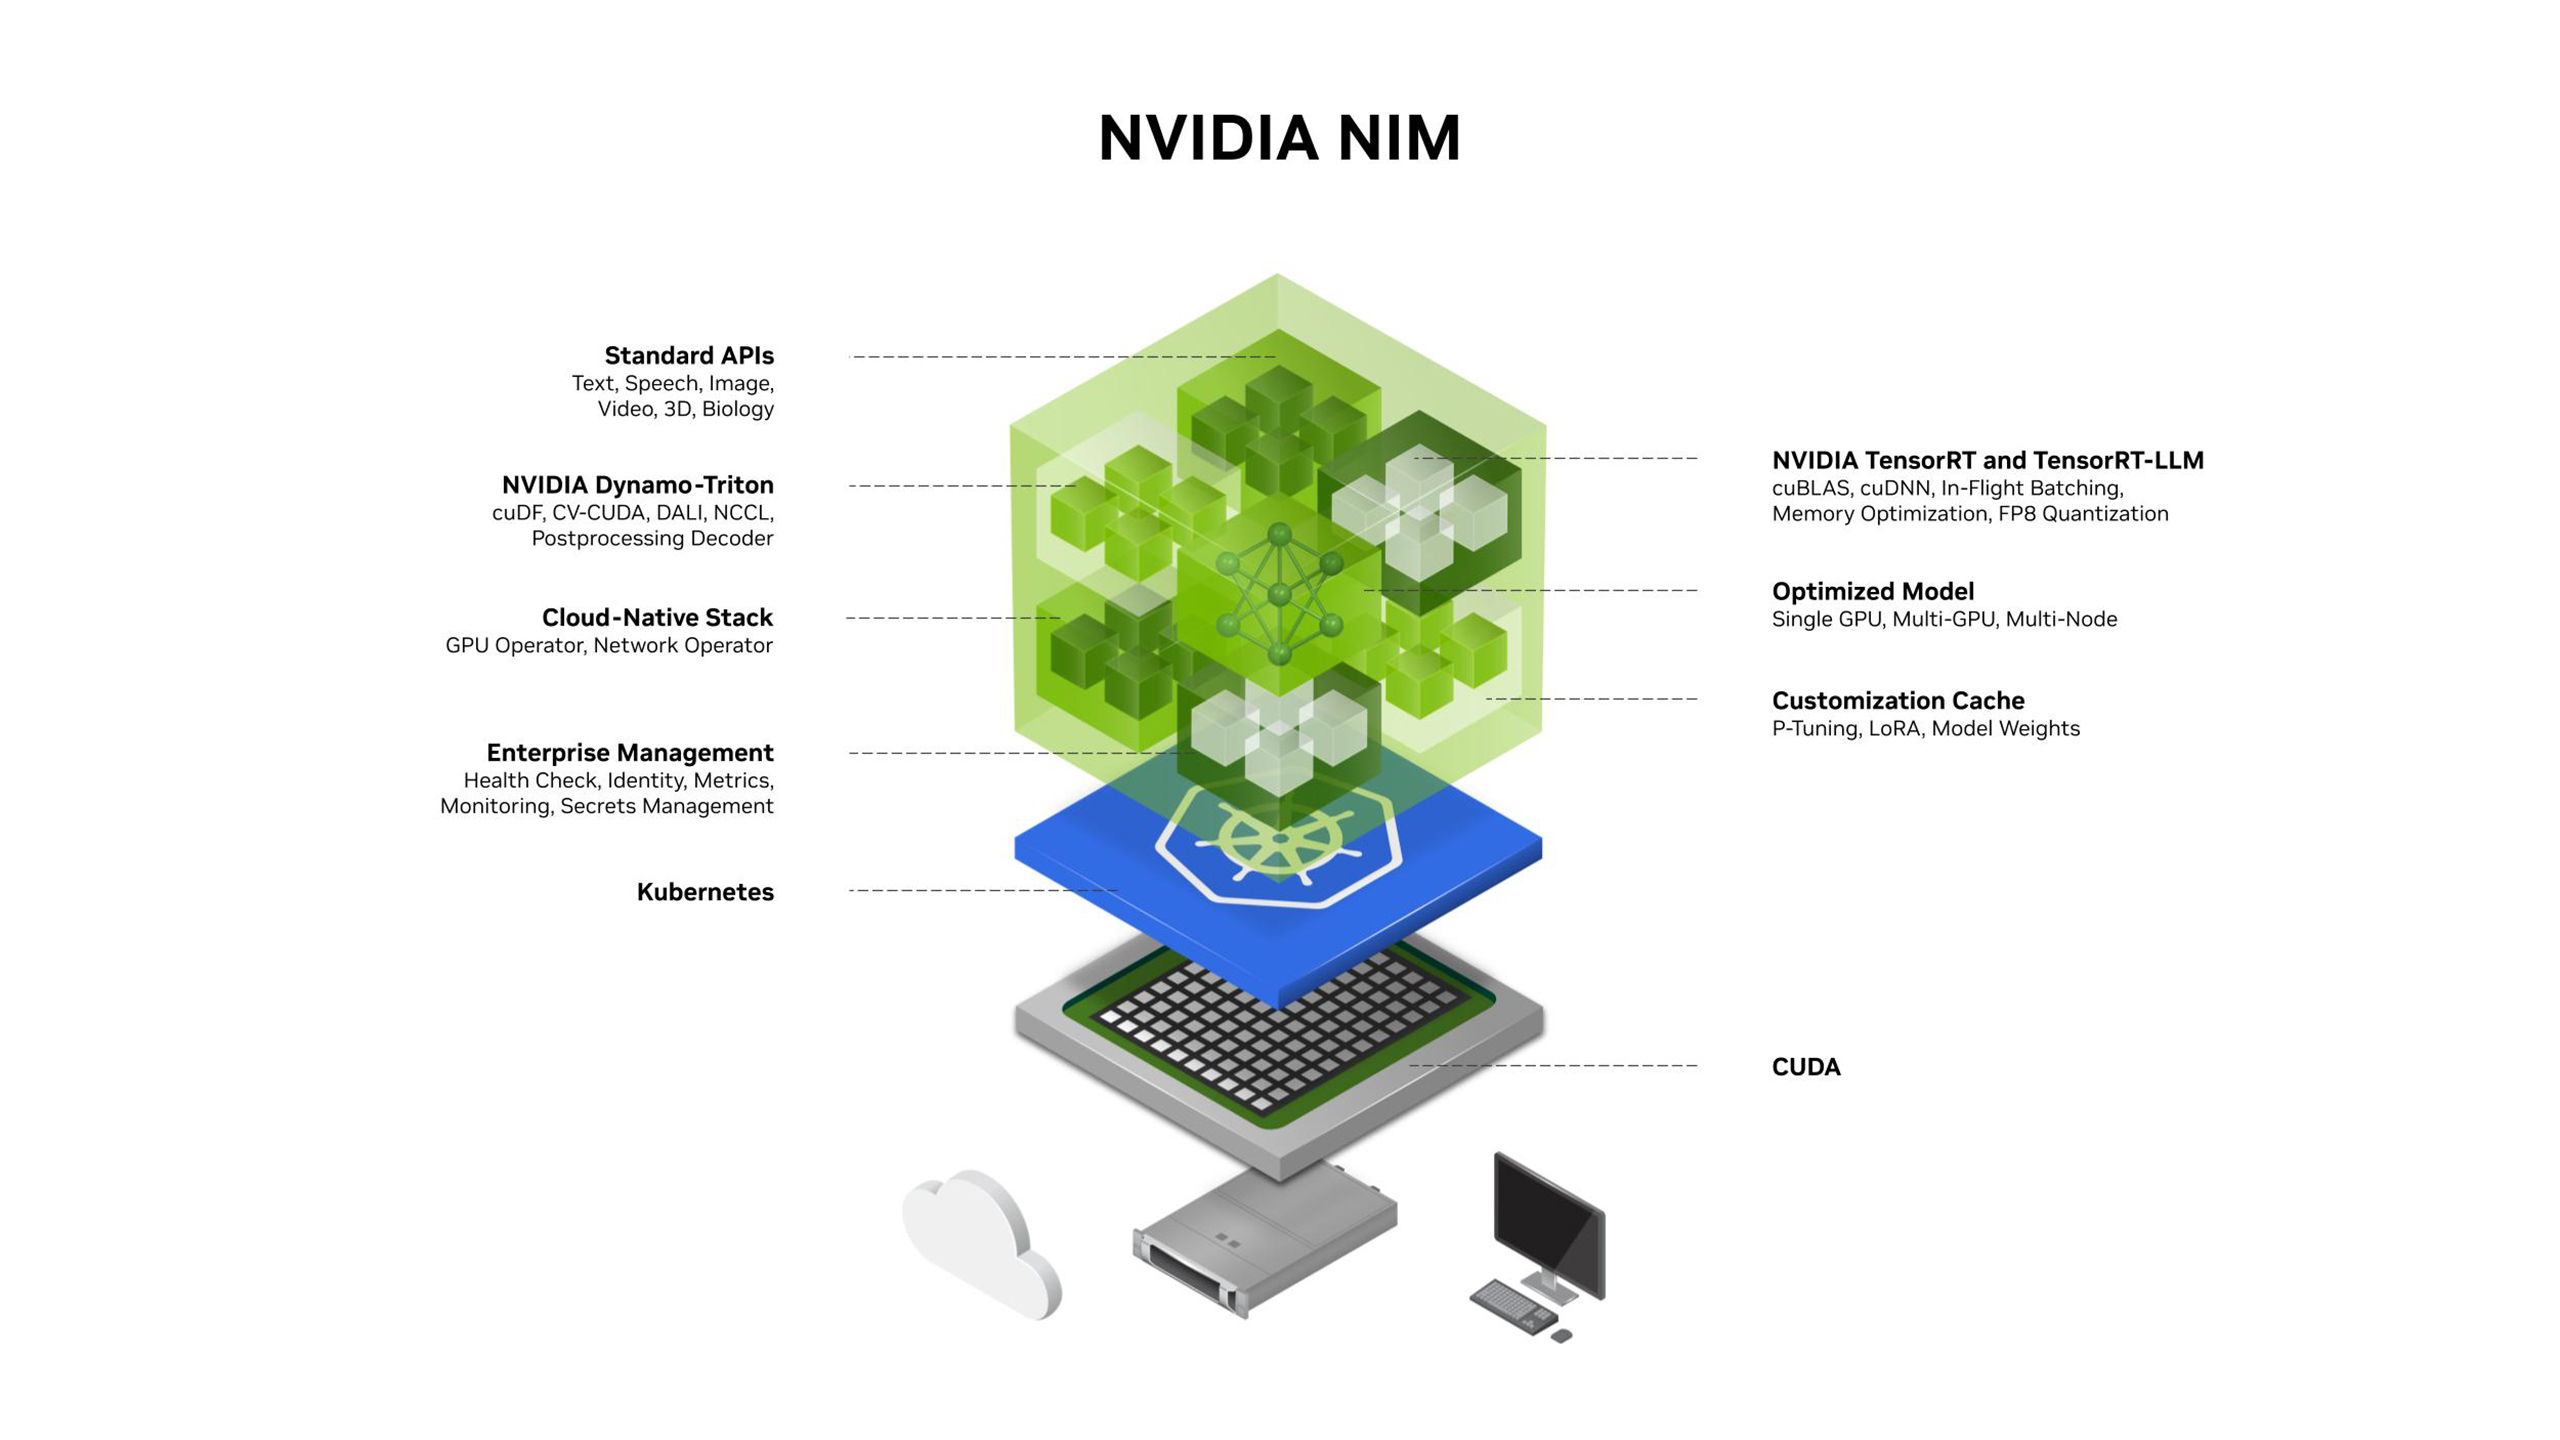
NVIDIA NIM offers containerized microservices that allow you to easily deploy GPU-accelerated inference for pretrained and custom AI models on a variety of platforms, including cloud environments, data centers, and RTX™ AI-powered PCs or workstations. These NIM microservices use standard APIs for straightforward integration into your AI apps, frameworks, or workflows, and are optimized for low latency and high throughput for each specific model and GPU setup.Key capabilities
- Optimized Model Performance: Improve AI application performance and efficiency with accelerated inference engines from NVIDIA and the community.
- Run AI Models Anywhere: Maintain security and control of applications and data with prebuilt microservices that can be deployed on NVIDIA GPUs anywhere—from RTX AI PCs, workstations, data centers, or the cloud. Download NIM inference microservices for self-hosted deployment, or take advantage of dedicated endpoints on Hugging Face to spin up instances in your preferred cloud.
- Multiple backend support: Works with SafeTensors, vLLM, SGLang, and TensorRT
- Quantization support: Deploy models in GGUF format (Q8_0, Q5_K_M, Q4_K_M) for memory efficiency
- Production-ready: Built-in optimization and scalability features
- GPU acceleration: Leverages NVIDIA GPUs for high-performance inference
- Choose Among Thousands of AI Models and Customizations: Deploy a broad range of LLMs supported by vLLM, SGLang, or TensorRT-LLM, including community fine-tuned models and models fine-tuned on your data.
Your Workflow: From Fine-Tuning to Deployment
Here’s how the process works with Prem Studio:- Fine-tune your model using Prem Studio’s intuitive interface
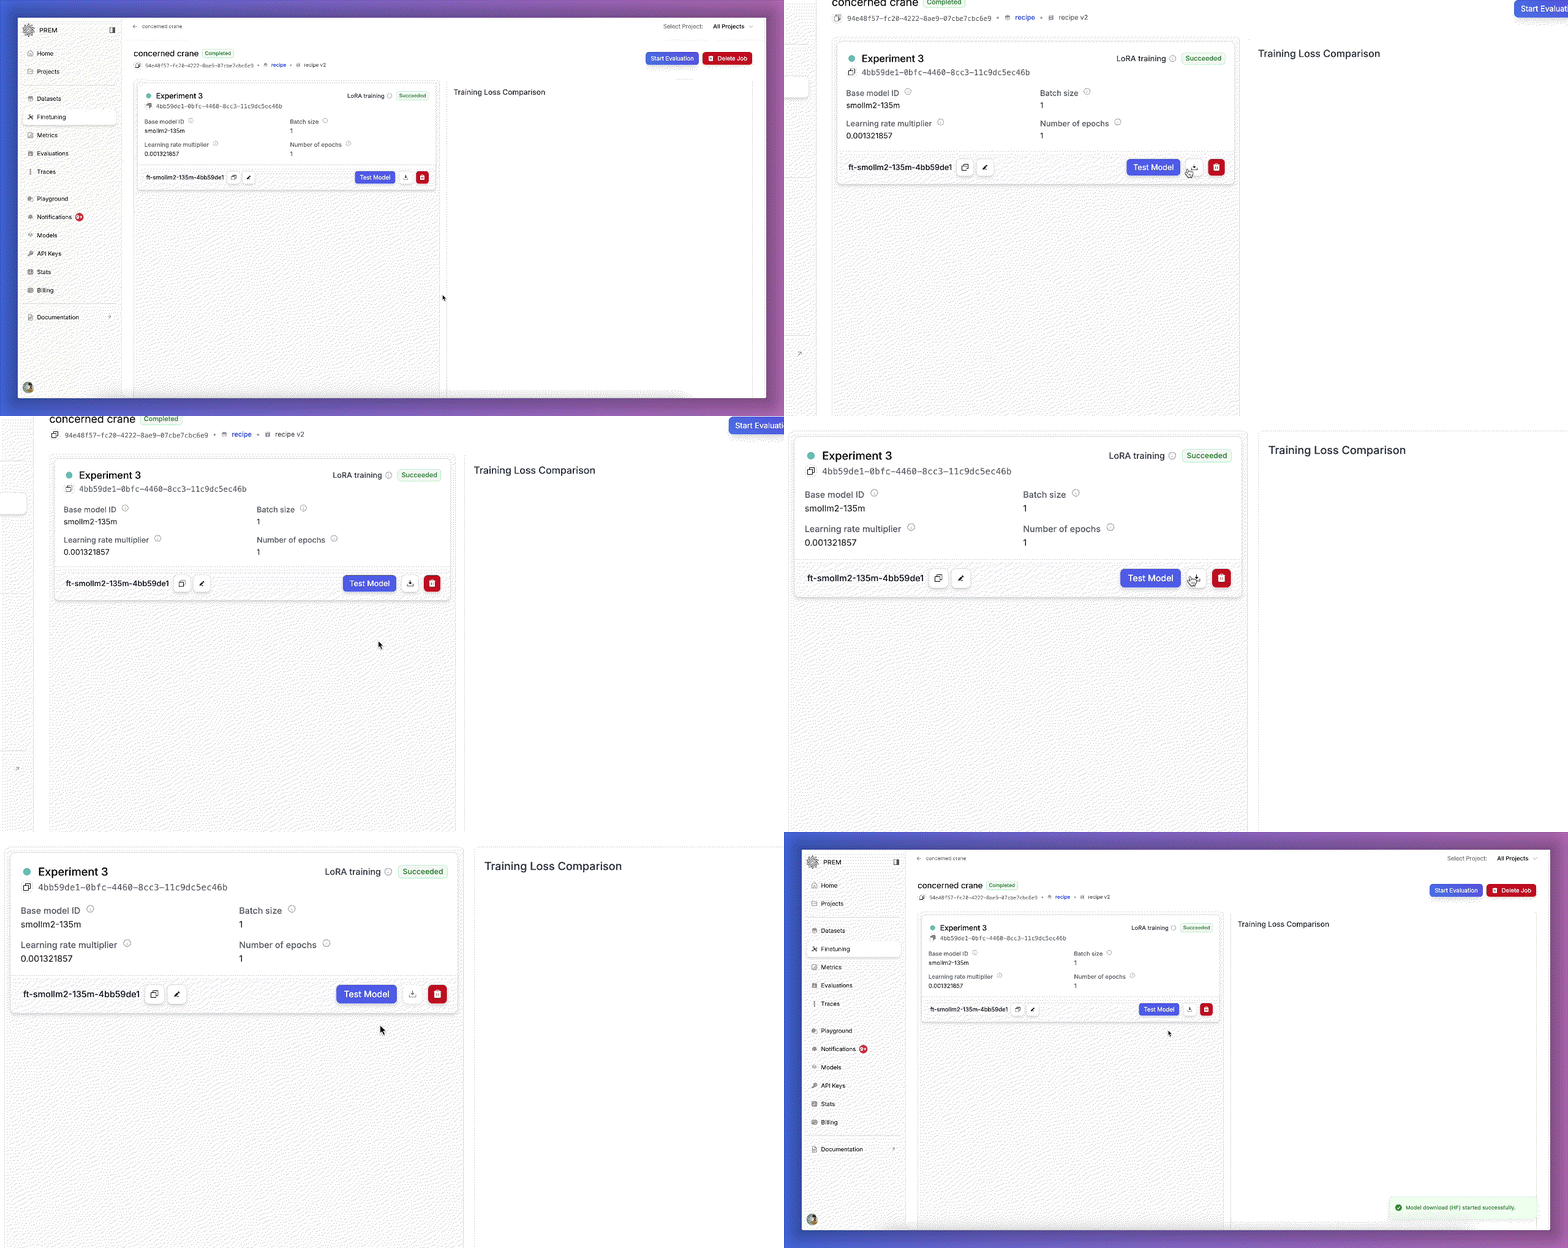
- Download checkpoints through the UI in your preferred format
- Deploy with NIM using the steps in this guide
Downloading Your Model from Prem Studio
After fine-tuning completes, Prem Studio lets you download your model checkpoints directly from the platform. You’ll have two format options:- HuggingFace-compatible checkpoints: Standard format with full precision
- GGUF-compatible checkpoints: Quantized versions for memory-efficient deployment

Deployment Guide
Prerequisites
Before we begin, make sure you have: Hardware:- NVIDIA GPU with at least 8GB VRAM (for smaller models like Llama 3.2 1B)
- 16GB+ system RAM recommended
- Sufficient storage for your model (varies by size and quantization)
- Docker with NVIDIA Container Toolkit
- NVIDIA NGC account and API key (Get yours here)
- Downloaded checkpoint from Prem Studio (HuggingFace or GGUF format)
- Model files stored locally on your system
Step 1: Setup Your Environment
Login to NVIDIA Container Registry
First, authenticate with the NGC registry to access the NIM container:Pull the NIM Container
Download the latest NIM container image:Step 2: Prepare Your Model
Organize your downloaded checkpoint in a directory structure. Here’s an example using a Llama 3.2 1B model:If you’re deploying a GGUF checkpoint, ensure your directory should be organized like the following. GGUF files don’t contain this metadata, so you’ll need to download it separately if it’s not included with your Prem Studio checkpoint.
Step 3: Deploy Your Model
Now let’s get your model serving! We’ll use Docker to run the NIM container with your fine-tuned model.Basic Deployment Command
Understanding the Parameters
Let’s break down what each parameter does:--name=nim-deployment: Gives your container a friendly name--runtime=nvidia --gpus all: Enables GPU access--shm-size=16GB: Allocates shared memory (important for large models)-e NIM_MODEL_NAME: Path to your model inside the container-e NIM_SERVED_MODEL_NAME: Name clients will use to reference your model-e NIM_MODEL_PROFILE: Backend to use (sglang, vllm, tensorrt-llm)-e NVIDIA_VISIBLE_DEVICES=0: Specifies which GPU to use-v "${MODEL_PATH}:${MODEL_PATH}": Mounts your model directory-v "/opt/nim/.cache:/opt/nim/.cache": Caches compilation artifacts-p 8000:8000: Exposes the API on port 8000
Choosing a Backend Profile
NIM supports multiple backend profiles optimized for different scenarios for non-GGUF models:sglang: Good default choice, efficient for most use casesvllm: Optimized for high throughput batch processingtensorrt-llm: Maximum performance, requires TensorRT-optimized models
Step 4: Wait for Startup
The first time you run NIM, it needs to compile and optimize your model. This can take 5-15 minutes depending on your model size and GPU. Watch the container logs:Step 5: Test Your Deployment
Once the service is running, you can start sending inference requests!Health Check
First, verify the service is healthy:Make Your First Request
Let’s generate some text using the OpenAI-compatible API:Performance Results
Here are some benchmark results to give you an idea of what to expect for TTFT (time to first token):These are the results for the Llama 3.2 1B model with 8,192 context length.
| Config | Backend / Quantization | Avg Latency (ms) | Min Latency (ms) | Max Latency (ms) |
|---|---|---|---|---|
| HF | VLLM | 93.74 | 79.34 | 257.13 |
| HF | SGLang | 104.11 | 92.76 | 270.69 |
| HF | TensorRT | 131.27 | 120.12 | 290.36 |
| HF | Safetensors | 139.75 | 126.28 | 297.32 |
| GGUF | q8_0 | 91.91 | 80.40 | 190.08 |
| GGUF | q5_k_m | 95.45 | 84.05 | 248.10 |
| GGUF | q4_k_m | 94.26 | 82.39 | 249.55 |
Next Steps
Now that you have your model deployed, you can:- Integrate with your application: Use the OpenAI-compatible API
- Optimize performance: Experiment with different backend profiles
- Scale up: Deploy multiple instances behind a load balancer
- Monitor: Set up logging and metrics collection
Summary
You’ve learned how to:- ✅ Download fine-tuned checkpoints from Prem Studio
- ✅ Set up NVIDIA NIM for model deployment
- ✅ Deploy models with different backend profiles
- ✅ Make inference requests using the API
- ✅ Optimize deployment for your hardware

