Objective
This tutorial aims to introduce you to DSPy and show you how to use it with the Prem SDK. Finally, in the later part of the tutorial, we will demonstrate how to use the Prem Platform to debug, see what DSPy has been optimizing, and how it can be further improved. In this tutorial, we are going to:- Write simple prompts using
dspy.Signatureto give instructions to the LLM. - Use
dspy.Moduleto write a simple Text2SQL pipeline. - Use
dspy.telepromptto automatically optimize the prompt for better results. - Use
dspy.Evaluateto evaluate the results.
Note
For those unfamiliar with DSPy, it is an LLM orchestration tool whose API is very similar to PyTorch. The main focus of DSPy is to help developers write clean and modular code, rather than writing very big prompts. You can learn more about it in their documentation or get a quick overview in our documentation. If you are new here, no problem. We have described what each part of the code does. All you need to be familiar with is Python.
Setting up the project
Let’s start by creating a virtual environment and installing dependencies.Before getting started, make sure you have an account at Prem AI Platform and a valid project id and an API Key. Additionally, you also need to have at least one repository-id as a last requirement.
Python
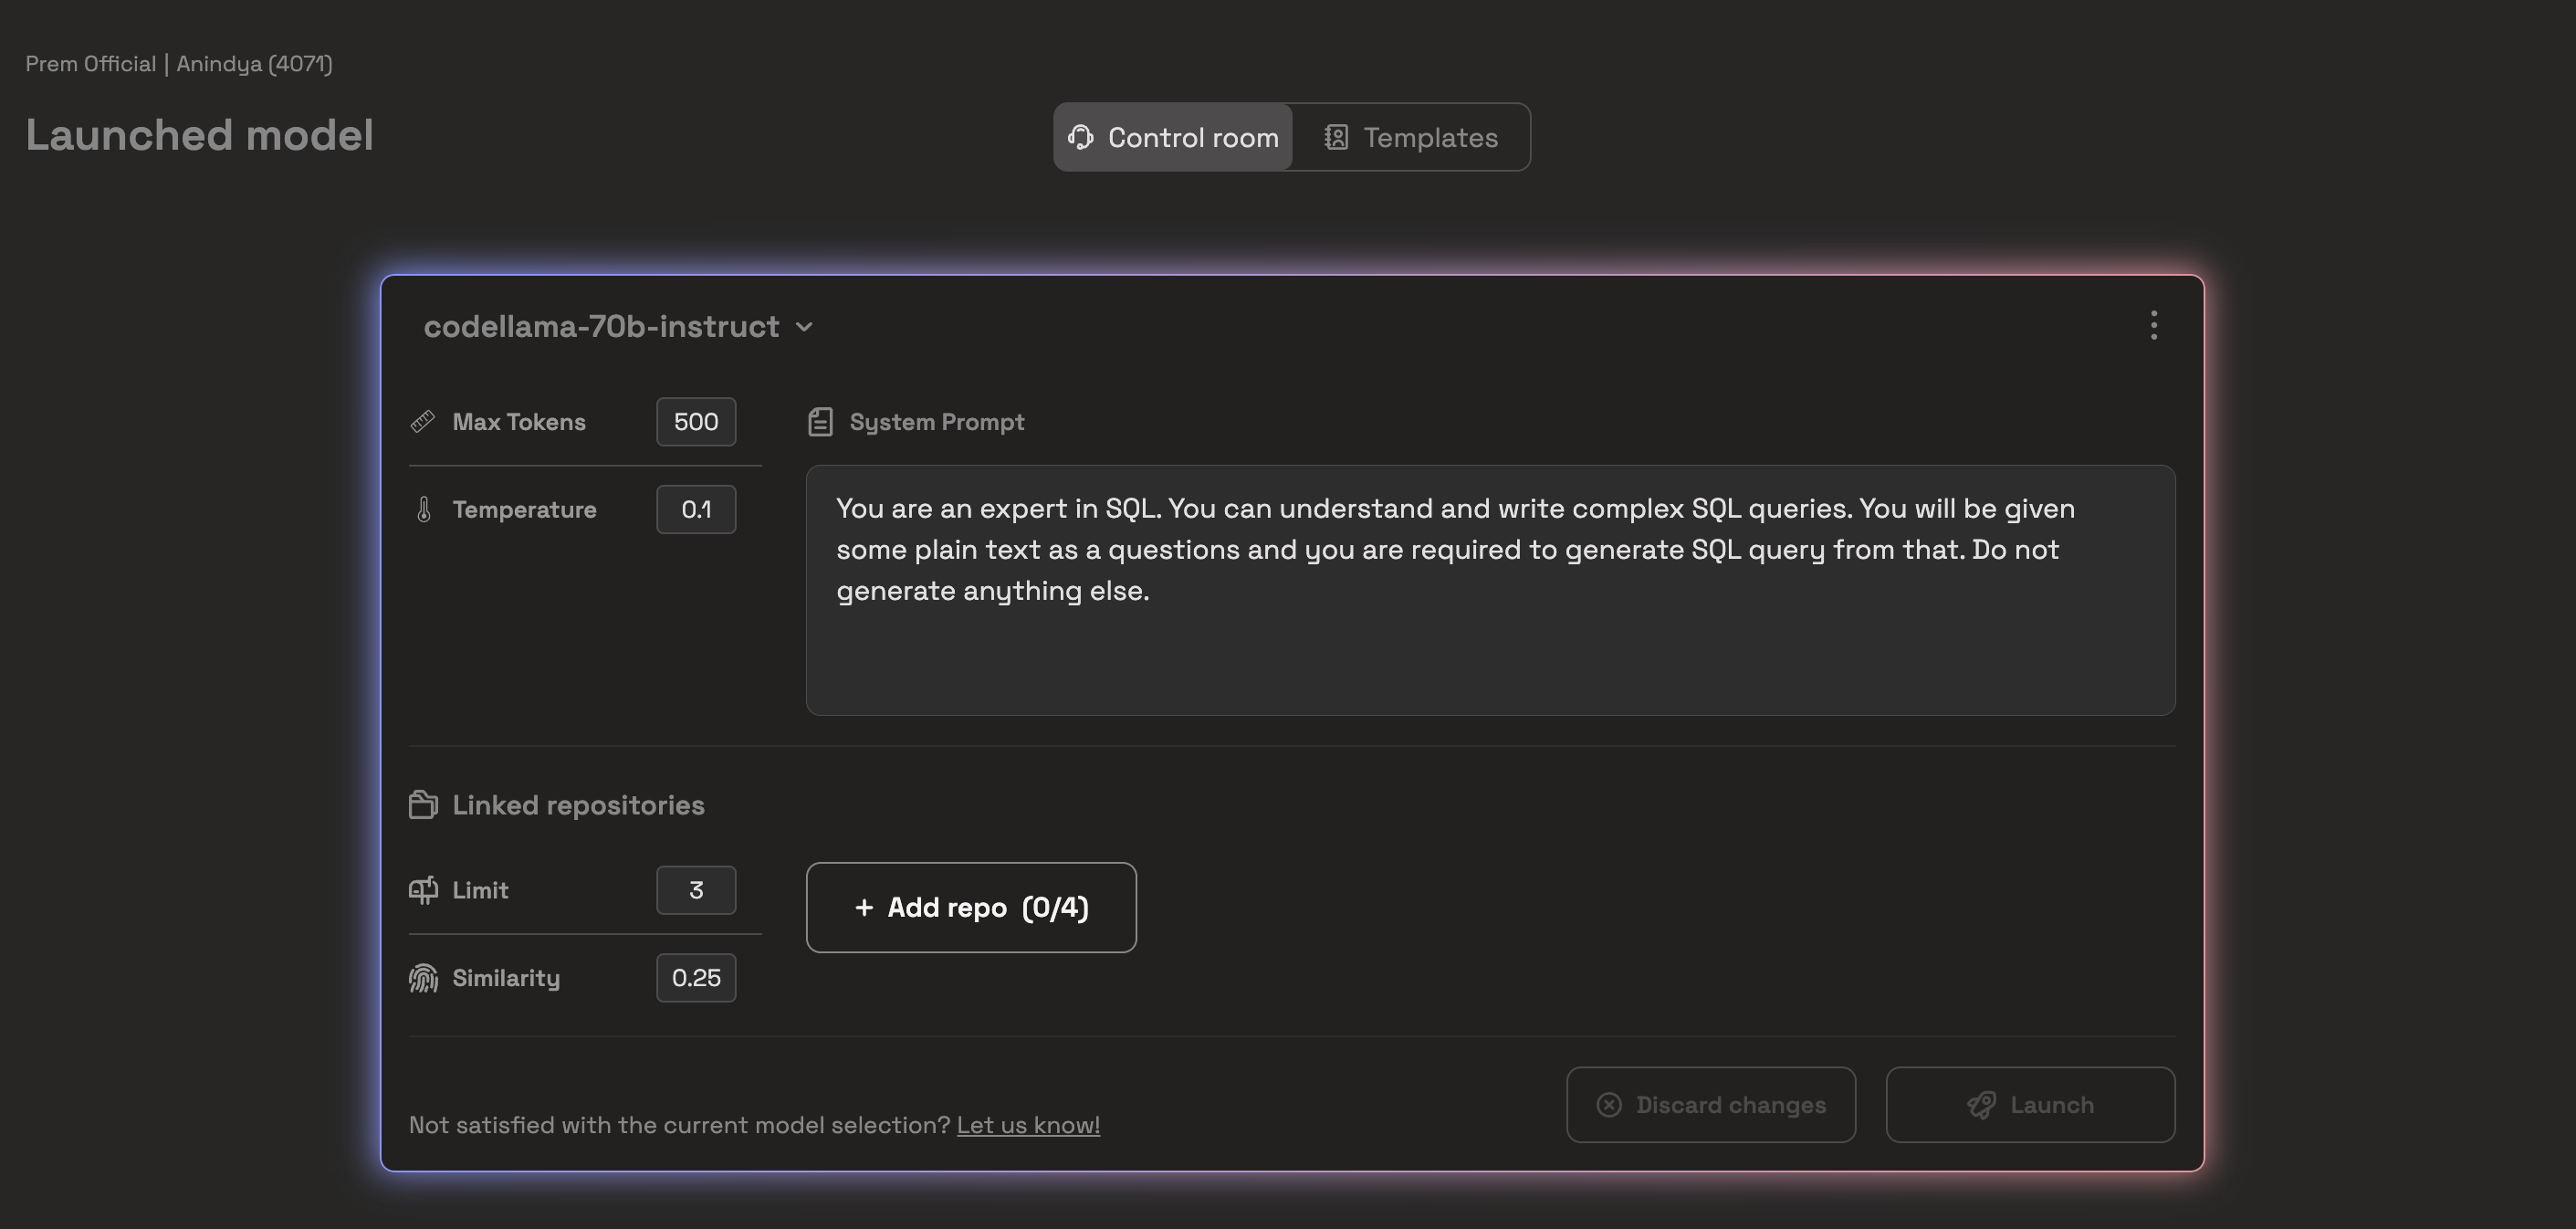
Prem AI offers a variety of models (see the list here) , so you can experiment with all the models. We conducted some initial experiments in Prem Playground, and we found that CodeLlama was performing consistently better than other models like Claude 3, GPT-4, and Mistral. Therefore, we are using Code Llama Instruct 70B by Meta AI for this cookbook experiment.
Python
We used the following system prompt
We used the following system prompt
You are an expert in SQL. You can understand and write complex SQL queries. You will be given some plain text as questions, and you are required to generate an SQL query from that. Do not generate anything else.
lm object and test it before moving forward.
Python
Loading Datasets
We start by loading a dataset. We will use the gretelai/synthetic_text_to_sql dataset for our example. We will also split the dataset into validation and test splits. The code below shows how we load and split the dataset using DSPy.Python
Python
Python
Output
Output
SQL_PROMPT:Calculate the total defense diplomacy events in 2021SQL_CONTEXT:CREATE TABLE defense_diplomacy (event_date DATE, event_type VARCHAR(255)); INSERT INTO defense_diplomacy (event_date, event_type) VALUES (‘2020-01-01’, ‘Summit’), (‘2021-01-01’, ‘Conference’), (‘2020-06-01’, ‘Workshop’);SQL:SELECT COUNT(*) as total_events FROM defense_diplomacy WHERE YEAR(event_date) = 2021;
Creating a DSPy Signature
Most LLM orchestration frameworks, like LangChain and llama-index, advise you to prompt the language models explicitly. Eventually, we need to tweak or optimize the prompts several times to achieve better results. However, writing and managing large prompts can be pretty messy. The primary purpose of DSPy is to shift the prompting process to a more programmatic paradigm. Signatures in DSPy allow you to specify how the language model’s input and output behaviour should be.The Field names inside a Signature have a semantic significance. Each field that represents a role (for example:
question or answer or sql_query) defines that prompt variable and what the variable is about. More explained below in an example.For this example, we will try to understand class-based DSPy Signatures. You can learn more about Signatures in the official documentation.Class-based DSPy Signatures
You define a class in class-based signatures where:- The class docstring is used to express the nature of the overall task.
-
You can provide different input and output variables using
InputFieldandOutputField, which also describe the nature of those variables.
Python
Output
Output
Prediction(
sentiment=“SELECT\n CASE\n WHEN ‘The day is super gloomy today ughhh’ LIKE ‘%gloomy%’ OR ‘The day is super gloomy today ughhh’ LIKE ‘%ugh%’ THEN ‘sadness’\n WHEN ‘The day is super gloomy today ughhh’ LIKE ‘%joy%’ OR ‘The day is super gloomy today ughhh’ LIKE ‘%happy%’ THEN ‘joy’ \n WHEN ‘The day is super gloomy today ughhh’ LIKE ‘%love%’ THEN ‘love’\n WHEN ‘The day is super gloomy today ughhh’ LIKE ‘%angry%’ OR ‘The day is super gloomy today ughhh’ LIKE ‘%mad%’ THEN ‘anger’\n WHEN ‘The day is super gloomy today ughhh’ LIKE ‘%fear%’ OR ‘The day is super gloomy today ughhh’ LIKE ‘%scare%’ THEN ‘fear’\n WHEN ‘The day is super gloomy today ughhh’ LIKE ‘%surprise%’ OR ‘The day is super gloomy today ughhh’ LIKE ‘%shock%’ THEN ‘surprise’\n ELSE ‘sadness’\n END AS Sentiment;”
)
lm.inspect method. Here is how it looks like for the Emotion class.
Python
Output
Output
Classify emotion among sandness, joy, love, anger, fear, surprise.
Follow the following format.Sentence: A sentence which needs to be classified Sentiment: classify in either of one class: sandness / joy / love / anger / fear /surprise. Do not write anything else, just the class. Sentiment:
Sentence: The day is super gloomy today ughhhSentiment:SELECT CASE WHEN ‘The day is super gloomy today ughhh’ LIKE ‘%gloomy%’ OR ‘The day is super gloomy today ughhh’ LIKE ‘%ugh%’ THEN ‘sadness’ WHEN ‘The day is super gloomy today ughhh’ LIKE ‘%joy%’ OR ‘The day is super gloomy today ughhh’ LIKE ‘%happy%’ THEN ‘joy’ WHEN ‘The day is super gloomy today ughhh’ LIKE ‘%love%’ THEN ‘love’ WHEN ‘The day is super gloomy today ughhh’ LIKE ‘%angry%’ OR ‘The day is super gloomy today ughhh’ LIKE ‘%mad%’ THEN ‘anger’ WHEN ‘The day is super gloomy today ughhh’ LIKE ‘%fear%’ OR ‘The day is super gloomy today ughhh’ LIKE ‘%scare%’ THEN ‘fear’ WHEN ‘The day is super gloomy today ughhh’ LIKE ‘%surprise%’ OR ‘The day is super gloomy today ughhh’ LIKE ‘%shock%’ THEN ‘surprise’ ELSE ‘sadness’ END AS Sentiment;
- Define the overall task in the class docstring.
- Provide input and output prompt variables.
- Describe Input and Output variables to tell what is expected here.
Python
Python
Python
SQL Output
SQL Output
Define a DSPy Module
Now we know how signatures work in DSPy. Multiple signatures or prompting techniques could work as a function. You can compose those techniques into a single module or a program. If you come from a deep learning background, you have heard abouttorch.nn.Module, which helps compose multiple layers to a single program. Similarly, in DSPy, various modules can be formed into more extensive modules (programs). Now, let’s create a simple module for our Text2SQL generator.
Python
Python
SQL Output
SQL Output
Metrics in DSPy
A metric is a function that quantifies how ground truth is related to the prediction and how sound the predicted output is. A simple example is accuracy. So, a straightforward metric could be a direct string match on whether our predicted SQL string is identical to the actual SQL string. Let’s create a custom metric where we:- First, normalize the SQL string. (This means removing all the ``` and “\n” characters to make them identical).
- Compare both strings and return 0 if they do not match and one if they do.
- Run the above two steps for all validation examples to calculate an average score.
Python
Optimizing a DSPy program
An optimizer (previously known as teleprompter) in DSPy optimizes the overall prompt workflow by tuning the prompt and the LM weights to maximize the target metrics, such as accuracy. Optimizers take three things in the input:- The DSPy Program: This may be a single module (e.g., dspy.Predict) or a complex multi-module program. It is already defined above.
- Metric Function: This function evaluates the program and assigns a score at the end. It is already defined above.
- Few training inputs: This may be very small (i.e., only 5 or 10 examples) and incomplete (only inputs to your program, without any labels).
LabeledFewShot optimizer. It simply constructs a few shot examples (which we call as demos) from provided labelled input and output data points. Let’s see it in action.
Python
dspy.Evaluate to evaluate our overall system. Here is how we do it:
Python
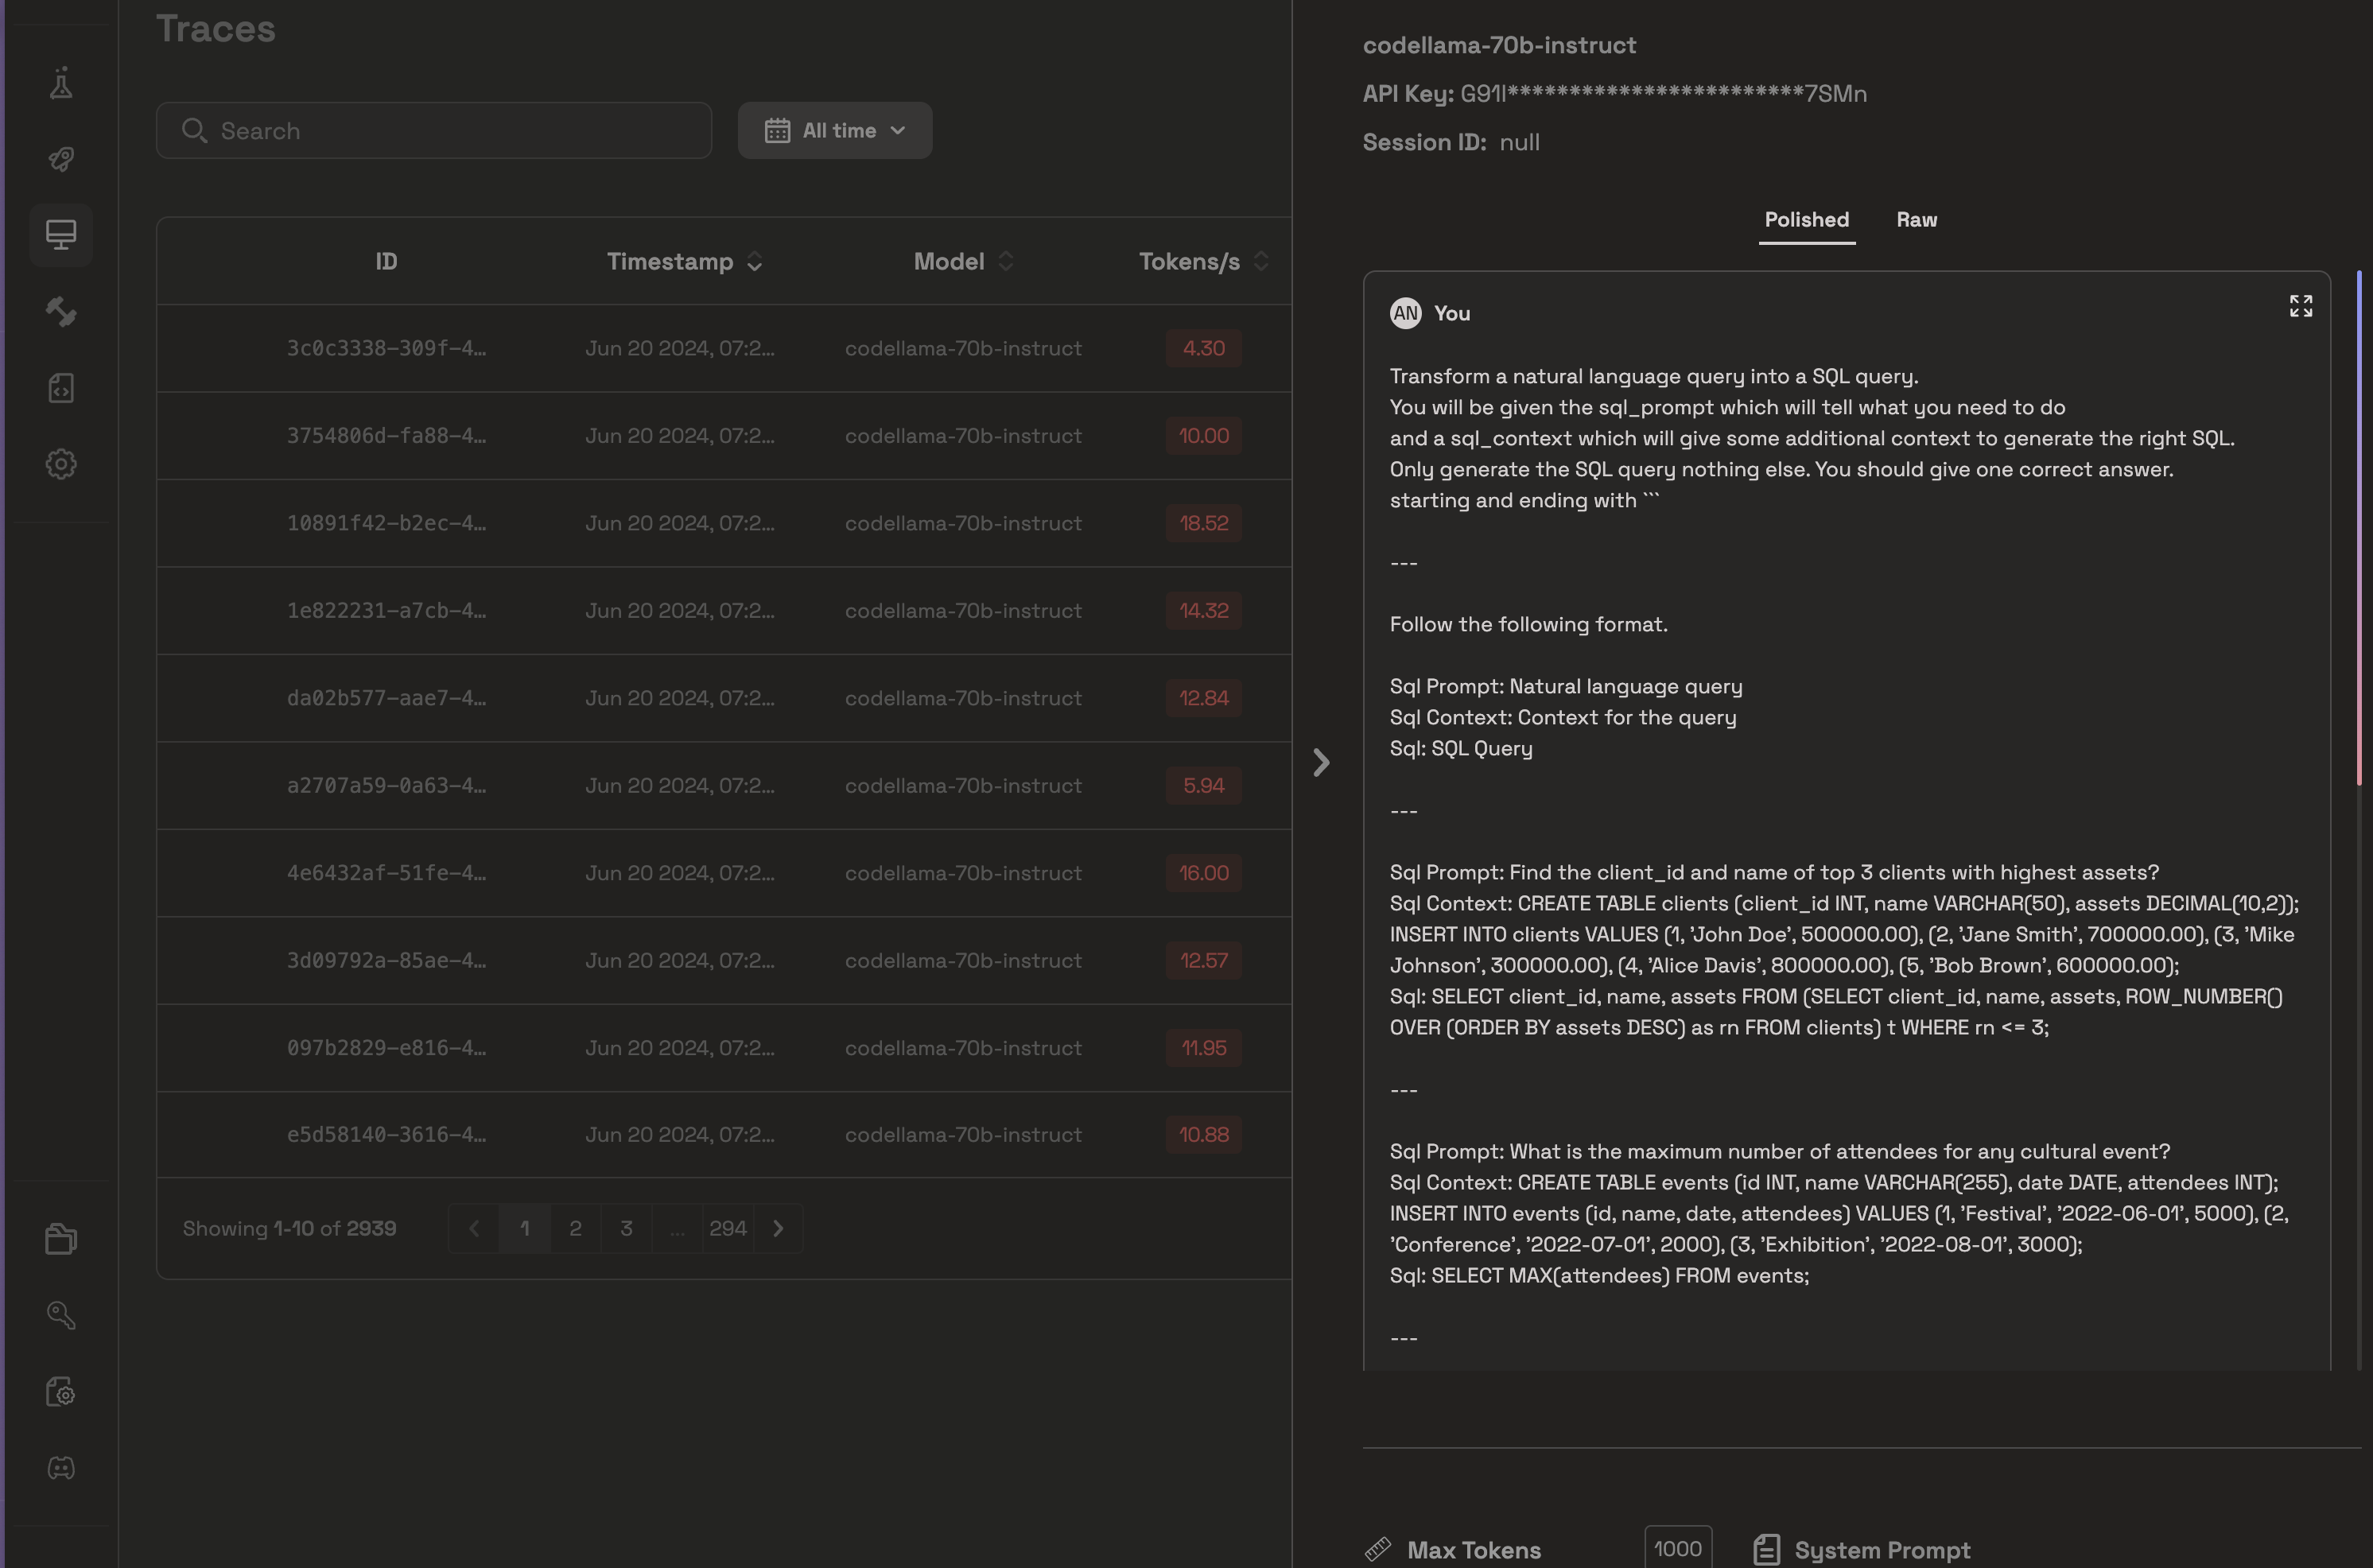
Conclusion
In this tutorial, we created a straightforward example of how to generate SQL from text. Forty-four percent is a fair accuracy for starting out. In this example, we used CodeLlama. However, we can use different models and see which works best for us. Additionally when you use Prem, you can actually see all the traces and runs of the model being captured in the traces section. Inside Traces, you can monitor each LLM run and see how DSPy optimized your prompt. Here is an example of our case: